SD Pi Setup
In this blog post we will dive into configuring a Raspberry Pi using an SD card reader and micro SD card.(500gb)

In this blog post we will dive into configuring a Raspberry Pi using an SD card reader and micro SD card.(500gb)
This blog post will differ from the original by pointing out you NEED ssh. This is the whole shabang for us, essentially, we want a network device. Having a full blown desktop requires desktop space for a keyboard and mouse plus the monitor. In our use case these are all servers which run different tools for us which we will build in other blog posts over time.
If you wish to follow the original instructions they are provided here. (est. 20 minutes)
Grab the ISO
Go over to the ubuntu site and grab the server or desktop version of the iso. When we provision servers its always the same. Go the the website of the OS distro we want find the architecture of our hardware and then some way some how deploy it to our box. The some way some how varies from company to company and infra to infra. In enterprises dedicated teams maintain custom images for consumption. These images come with things like custom certificates, preconfigured users (or authentication servers), package manager redirects (Artifactory), and custom security patches.
When the installer pops up for Raspberry Pi Imager we choose local image at the bottom and point to what we downloaded above to avoid double downloads. You can always do it the other way around but I want the user experience of going to the site and grabbing the ISO themselves
Grab the Installer
You can find the installer that puts the server image on your SD card on this page. Click on the link that matches the OS you are running this tutorial from.

Add the OS to the Image
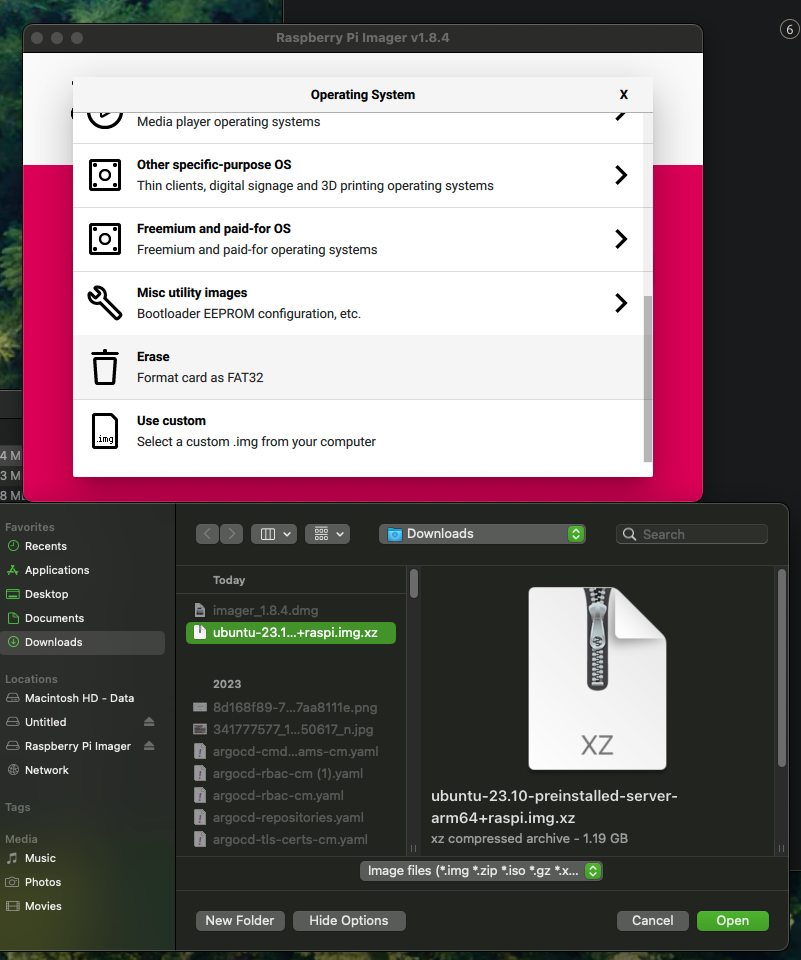
Open the install, scroll to the bottom, and select custom OS. When the selection window opens point it to the OS we downloaded in the previous step.
Configure Advanced Features
When you connect a pi to your network you can do it either through wireless or wired. Personally I prefer wired because I power the pi with the same cable it uses to connect to the network. If you are running wireless you will be required to buy an adapter to connect via usb to the pi. The advanced section allows you to configure things like hostname, wifi password, and most importantly public ssh keys.
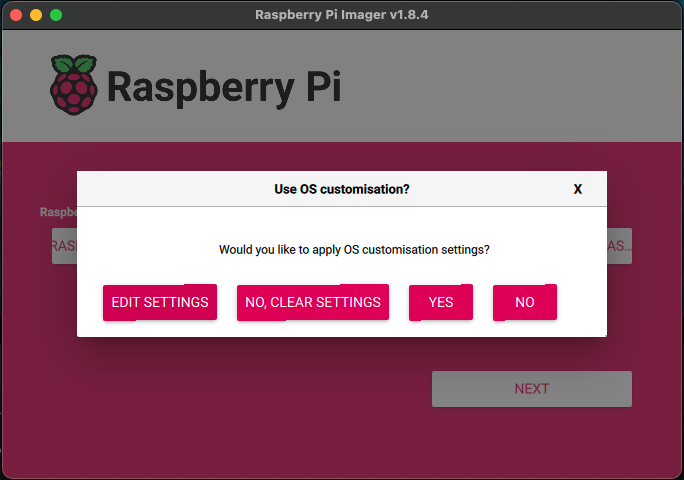
Click edit settings and configure things to your liking.
Setting the pi name - I am running pi4's and 5's in my cluster with multiple units. My naming convention will be piModel-doubleDigitNumber.
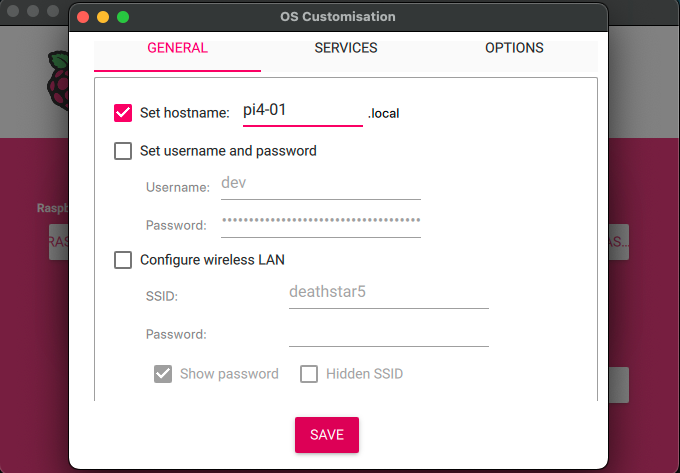
Configure SSH so when the pi comes online you can connect to it by clickin the box that says Enable SSH.

If you do not have a public key automatically set here follow THIS tutorial on cryptography 101 to configure your private and public key.
First Boot
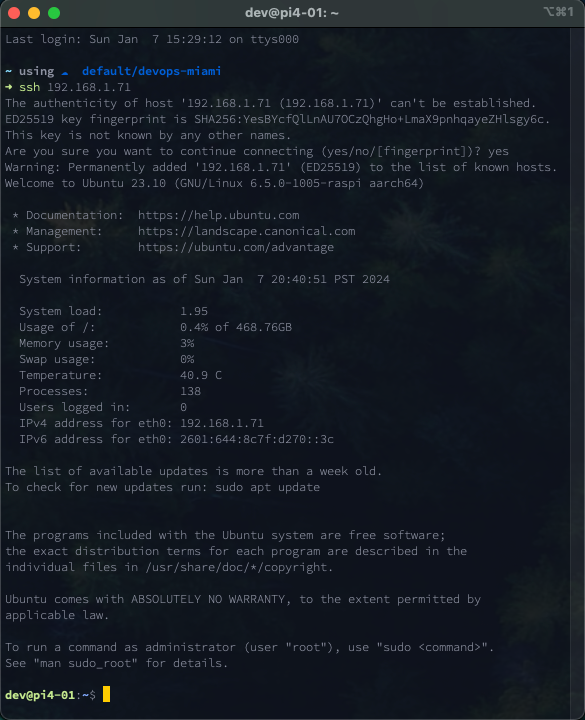
Grab the SD card and plug it into your pi. At this point you can power on your pi and hunt it down on the network. Once you find out your IP address you can ssh over to the box and should have a successful connection.
See more below on locating it on the network.
Hunting on the Network
I am running on a Netgear router and it has an app where I can see the new device pop up. It has the hostname I set in the advanced settings so its very easy to spot. Once you grab its IP address from that screen use a terminal to ssh to it from your main machine.